Tutorial: Secured remote working with Microsoft RDP without VPN

Introduction RDP without VPN
In order to make remote working more secure and flexible, the implementation of a Remote Desktop Gateway is very useful.
One of the big advantages over VPN is the ability to lock file copy and clipboard access. In addition, setting up a VPN gateway can be insecure. Indeed, in the case of a Trojan horse attack, the latter can reach the internal network, unlike RDP.
The purpose of this documentation is to detail the installation and configuration of this gateway. We will therefore see :
-
The installation of the server role
-
The configuration of this role with in particular :
- The installation of the safety certificate
- The configuration of local accounts
- The configuration of the gateway itself
-
Firewall configuration to best secure the gateway
-
The configuration required to add additional security features
-
Configuring the Windows RDP Client to use the Gateway
1 Gateway Installation
Prerequisite: A windows server 2008 or later
1.1 Installing the server role
The fastest way to install the server role is to use the following PowerShell command:
Add-WindowsFeature RDS-Gateway -IncludeAllSubFeature -IncludeManagementTools
Then wait while the role, its prerequisites and management tools are installed.
1.2 Configuring the role
1.2.1 Installation of the security certificate
In order to be able to use the gateway, not only is a certificate required, but also the safety chain must be respected. If, for example, an attempt is made to access the gateway without using one of the names declared in the certificate, the connection will be impossible.
For this purpose, you will need to use your Wildcard Certificate, associated with the existing DNS name ip1 . YourDomainName . com, which will allow access to the gateway.
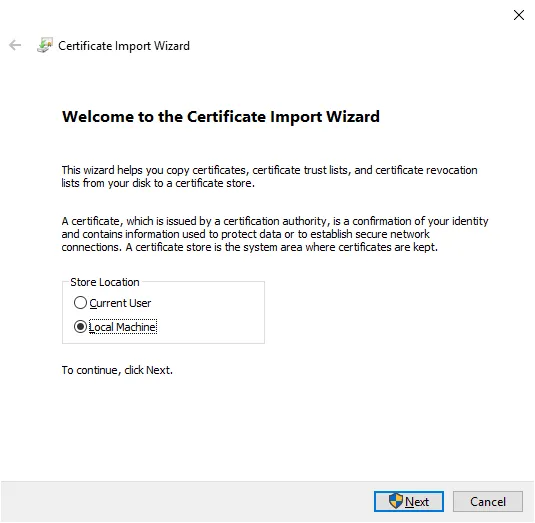
Double-click on the PFX format certificate to start the installation and select Local Machine.
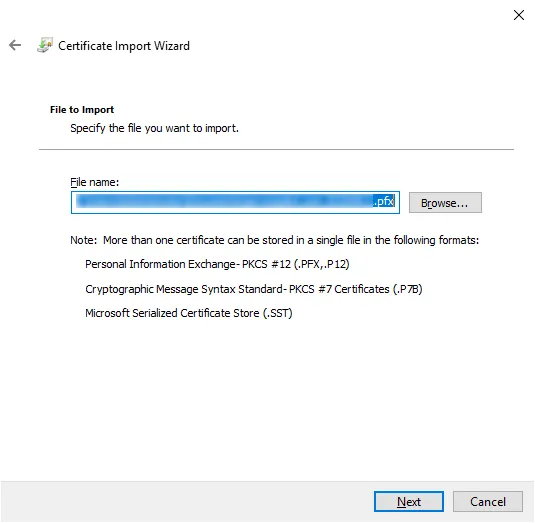
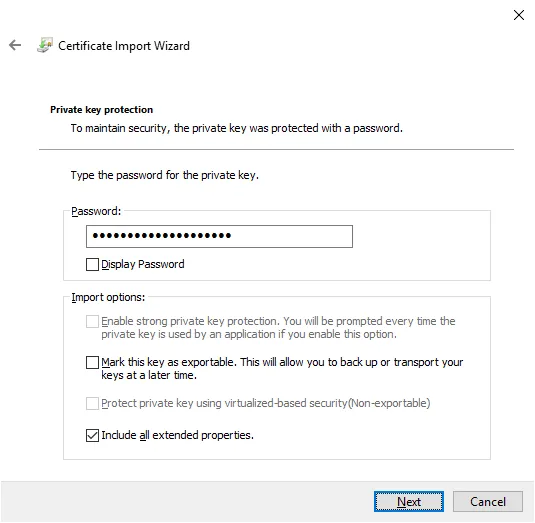
Validate the path of the certificate, click on Next, enter the password associated with the certificate then click on Next.
 |
 |
|---|
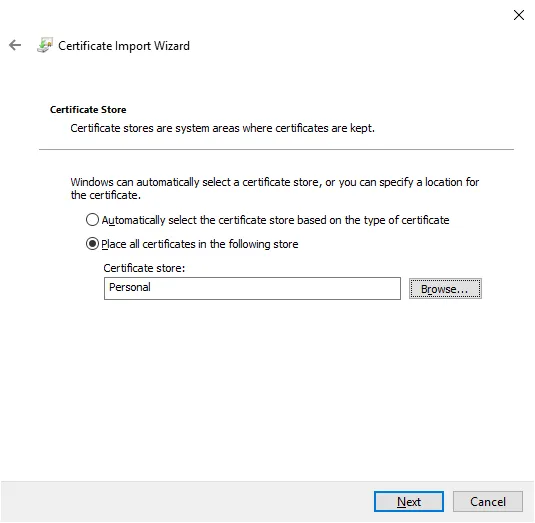
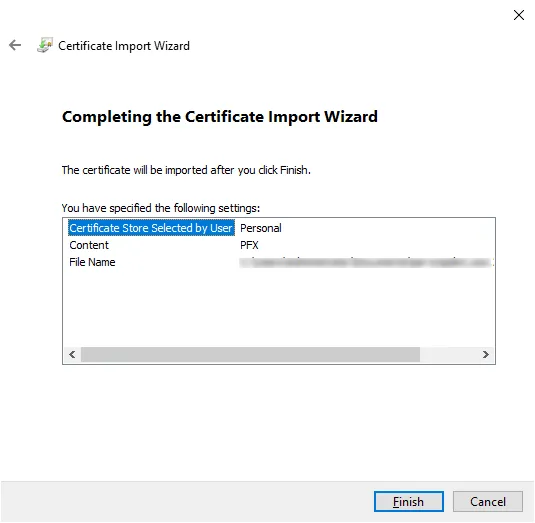
Select Place all certificates in the following store, choose the Personal store, click on Next, then click on Finish to complete the installation.
 |
 |
|---|
1.2.2 Local Account Setup
In order to allow users to log in by name, we will need to use the machine's local accounts to enable gateway authentication.
To do this, open the local user and group management console : lusrmgr.msc
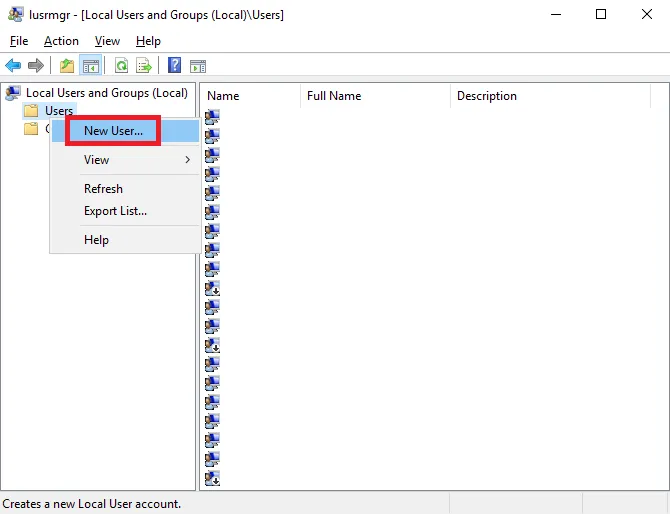
To create a new user, right click on Users and choose New User....
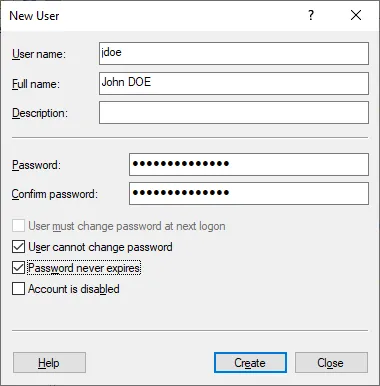
In the window for creating a new user :
- Enter the identifier in the format first letter of the first name + last name.
- Enter full name
- Enter the password
- Confirm password
- Uncheck the box User must change password at next logon.
- Check the box User cannot change password.
- Check the box Password never expires.
- Click on the Create button to validate
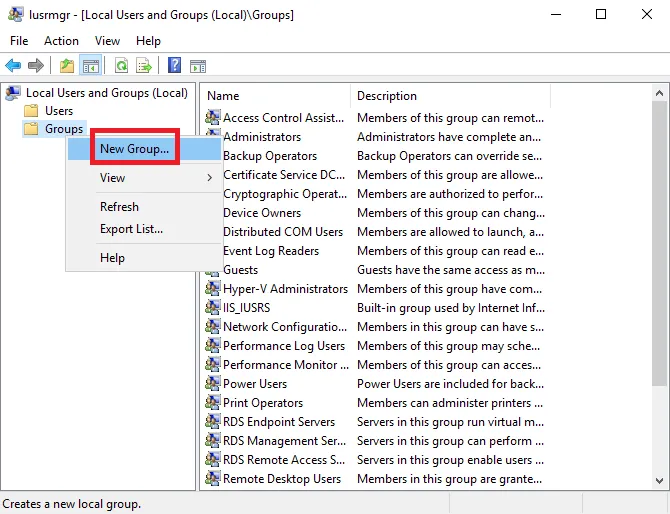
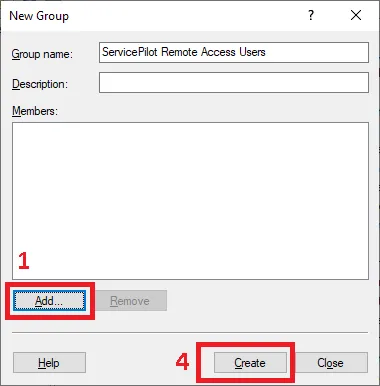
We will then create a new group. Right-click on Groups then click on New group .
In the window for creating a new group :
-
Give the group a name
-
Click on the Add button
-
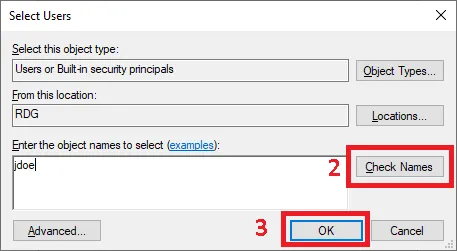
Enter the password
-
Enter the user's identifier
-
Click on the Check Names button to validate the account.
-
Click on OK
-
Repeat the operation for the other accounts.
-
Finally click on the Create button to create the account.
 |
 |
|---|
1.2.3 Remote Office Gateway Configuration
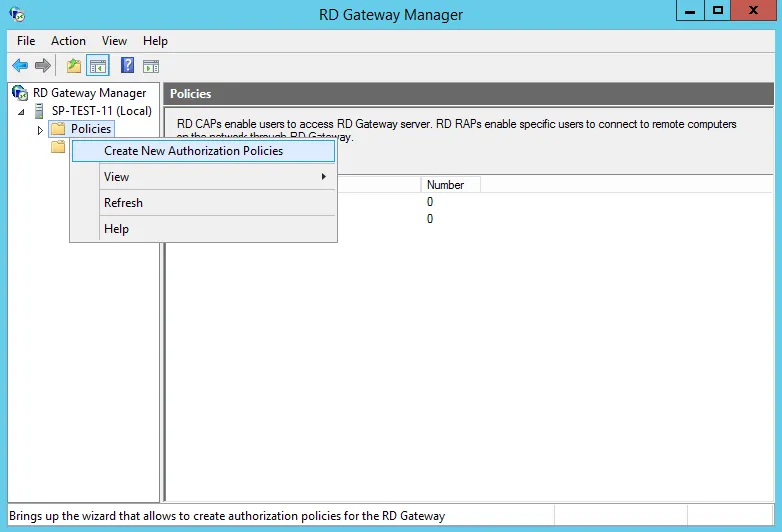
To configure the gateway, open its management console (win + r) : tsgateway.msc
1.2.3.1 Creating Authorization Strategies
Right-click on Policies and then click on Create New Authorization Policies.
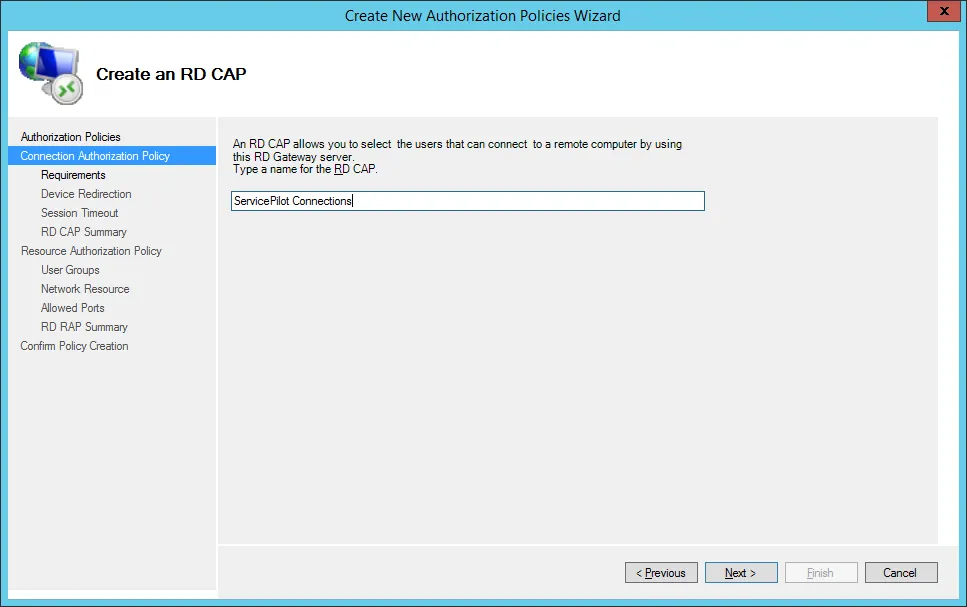
Leave the default option and click on Next.

Give a name to the connection authorization policy and click on Next..
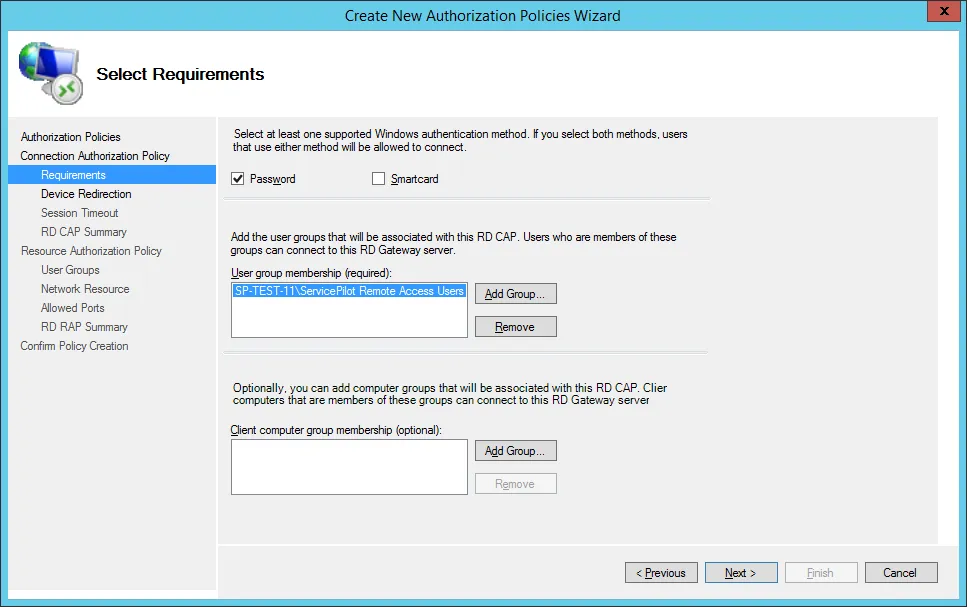
Note: this strategy allows you to filter users, select connection methods (password and/or smart card), disable some features (USB redirections, clipboard...) and set a timeout.
Select the necessary authentication methods, add the group created in the previous step in the User group membership section and click on the Next button.
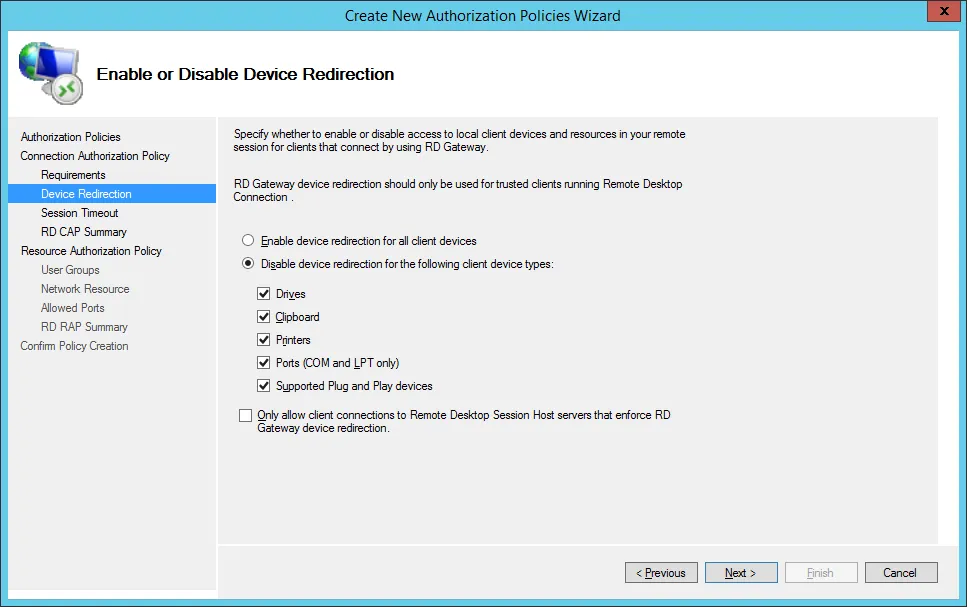
On the device redirection page, select Disable device redirection for the following client device types and check all the boxes below. Then click on the Next button.
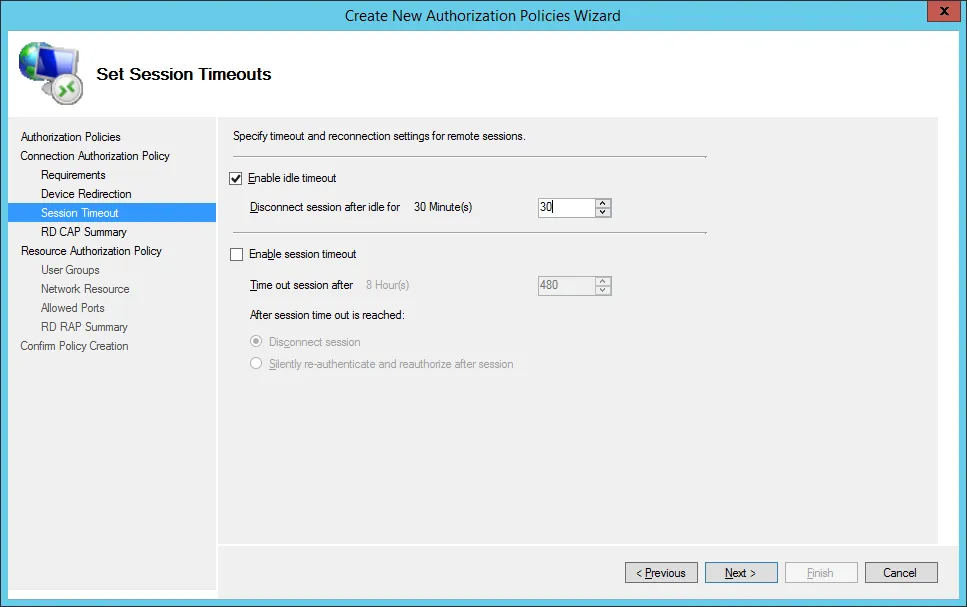
Check the Enable idle timeout box, enter the value 30 for 30 minutes and click on Next.
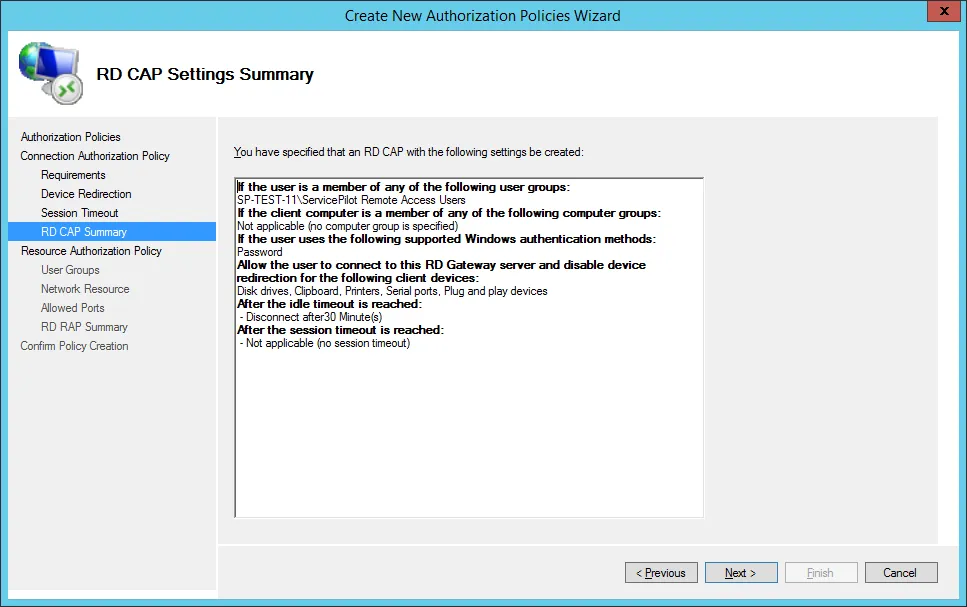
Check the summarized information, then click Next.
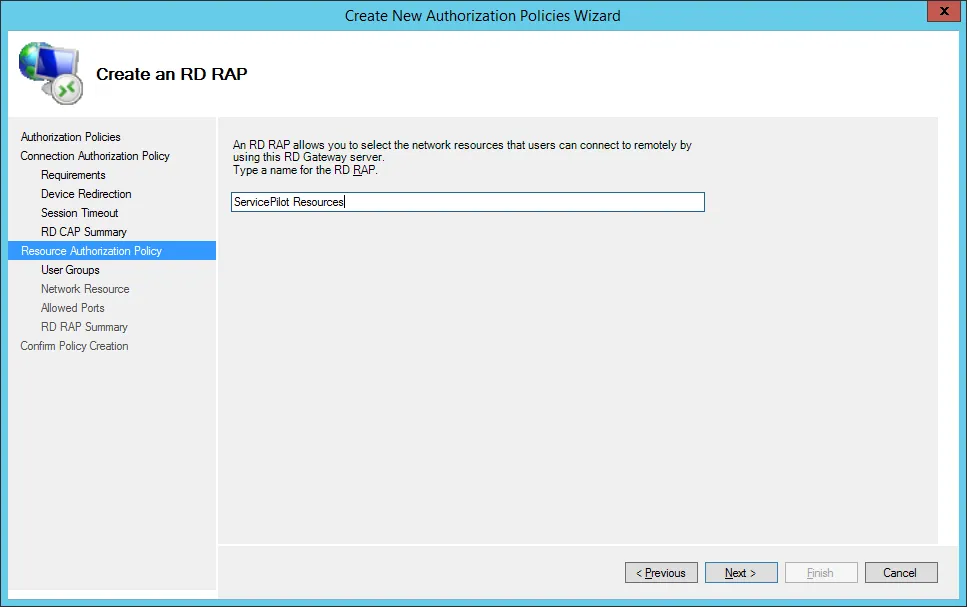
Then give a name to the resource access policy and click on Next.
Note: this policy allows you to filter the local resources that users will be able to access as well as the authorized connection ports for RDP.
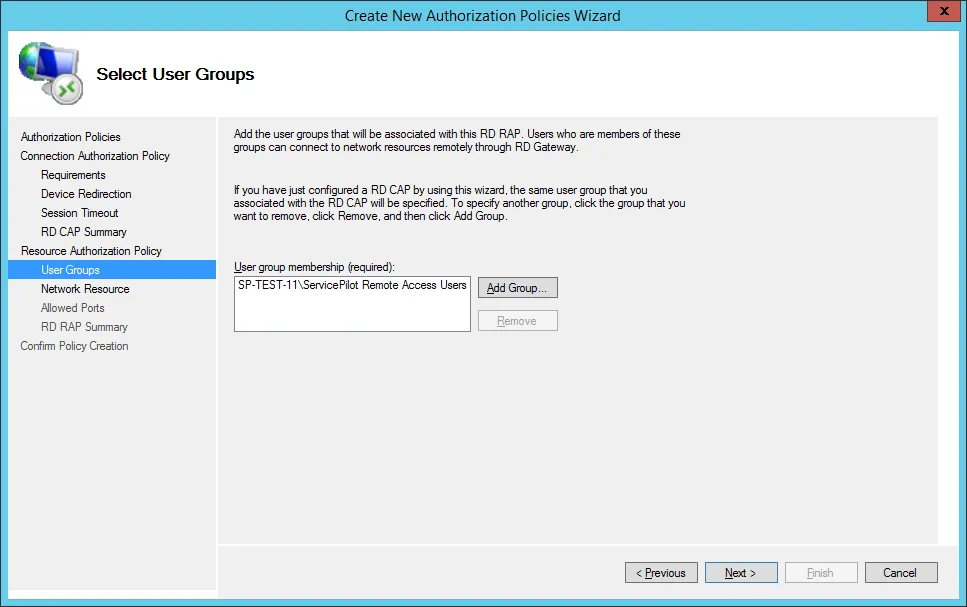
By default, the wizard will pre-populate the group entered in the connection authorization policy. Click on Next.
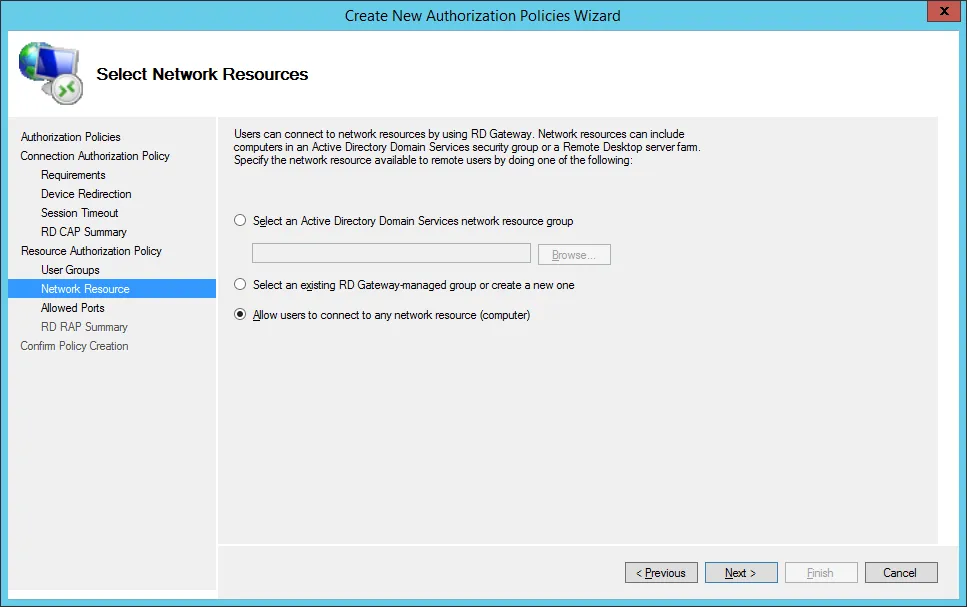
The wizard will then ask which resources are allowed. As we are not interfaced with Active Directory, select Allow users to connect to any network resource (computer) then click on Next.
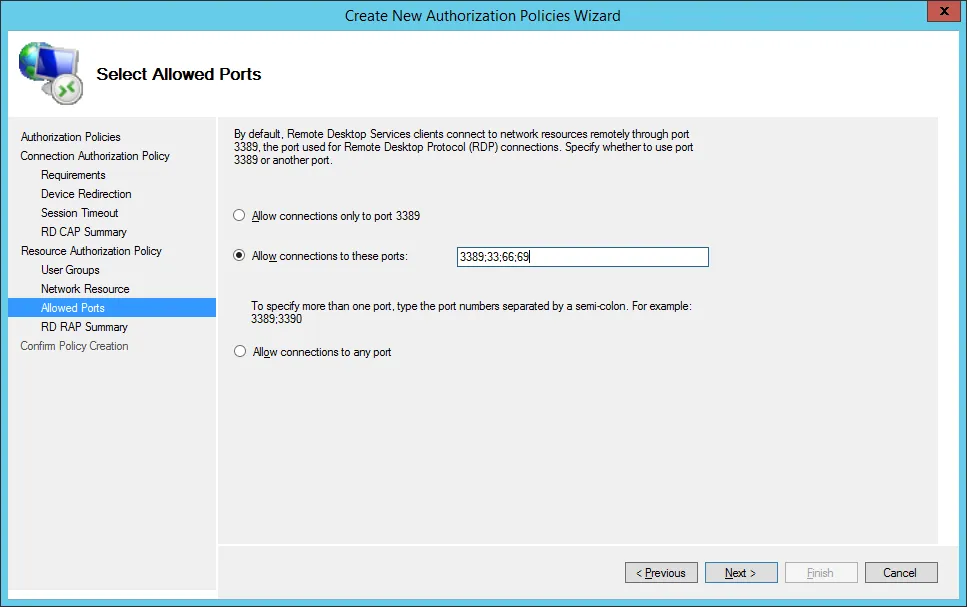
On the Allowed Ports selection page, select Allow connectivity to these ports and enter the next port:
- 3389: default port used for all machines
Then click on the Next. button.
On the page that summarizes the information entered, click on Finish.

1.2.3.2 Installing the certificate and defining the access port
Back in the management console, we will now complete the configuration by importing the security certificate and configuring the access port.
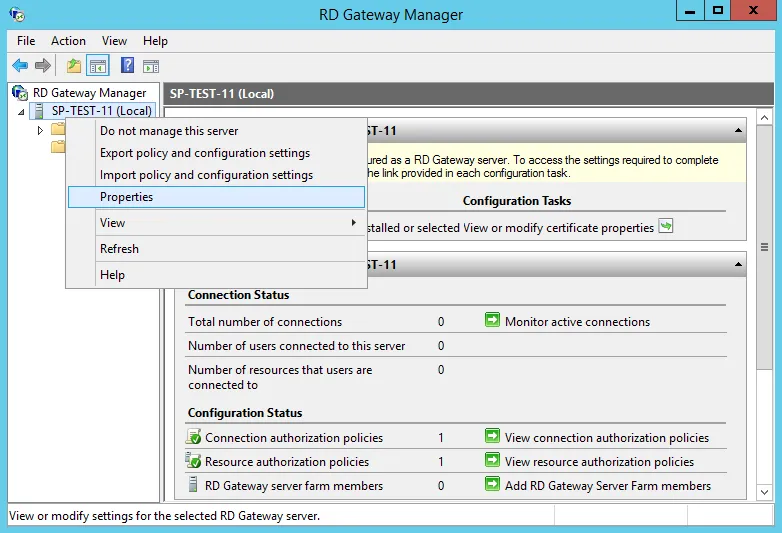
Right-click on the server name and then click on Properties.
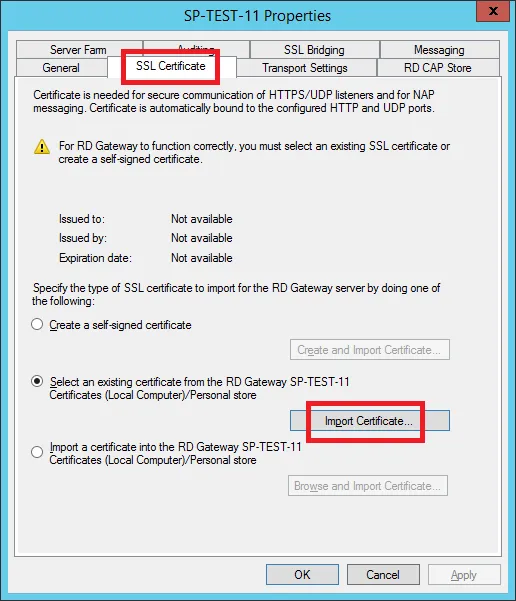
Click on the SSL Certificates tab and then on the Import Certificate... button.
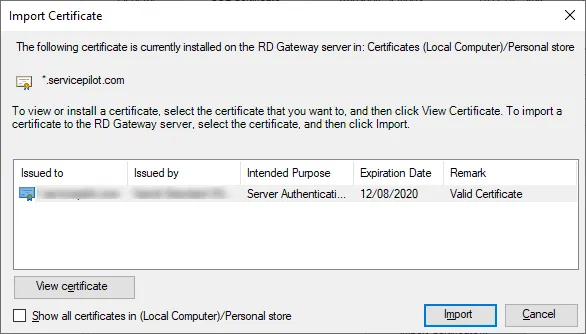
Select the imported certificate, then click on the Import button.
Back in the server properties, click on the Transport Settings tab, specify the access port, here 875, then click on the OK button. A warning will then appear indicating that restarting the service is necessary. Click on the Yes button.

1.3 Windows Firewall Configuration
In order to make the machine as secure as possible, we will remove all the preconfigured firewall rules
netsh advfirewall firewall delete rule name=all
Then allow only the necessary flows to be allowed, namely:
On entering..:
- the TCP/875 for access to the gateway
netsh advfirewall firewall add rule name="Allow RD Gateway (TCP/875) in" protocol=TCP dir=in action=allow localip=xx.xx.xx.xx localport=875
- TCP/3389 for local RDP access for maintenance purposes only
netsh advfirewall firewall add rule name="Allow RDP (TCP/3389) in" protocol=TCP dir=in action=allow localip=xx.xx.xx.xx.xx localport=3389 remoteip=xx.xx.xx.xx.xx/8
On the way out:
- The TCP/3389 which will bounce on the local machines
netsh advfirewall firewall add rule name="Allow RDP (TCP/3389) out" protocol=TCP dir=out action=allow localip=xx.xx.xx.xx.xx remoteport=3389
- UDP/53 to enable DNS resolution
netsh advfirewall firewall add rule name="Allow DNS (UDP/53) out" protocol=UDP dir=out action=allow localip=xx.xx.xx.xx remoteip=xx.xx.xx.xx.xx remoteport=53
- UDP/123 to keep the machine synchronized via NTP
netsh advfirewall firewall add rule name="Allow NTP (UDP/123) out" protocol=UDP dir=out action=allow localip=xx.xx.xx.xx remoteip=xx.xx.xx.xx.xx remoteport=123
- A specific rule will also be created to allow the ServicePilotAgent executable to communicate with its manager.
netsh advfirewall firewall add rule name="Allow ServicePilotAgent out" program="C:\Program Files (x86)\ServicePilot\ServicePilot ISM Enterprise\ServicePilotAgent.exe" dir=out action=allow
1.3 Additional Configurations
We will then perform additional configuration to allow us to lock an account if more than 3 wrong passwords are entered. To do this, we will launch the local Group Policy Editor : gpedit.msc
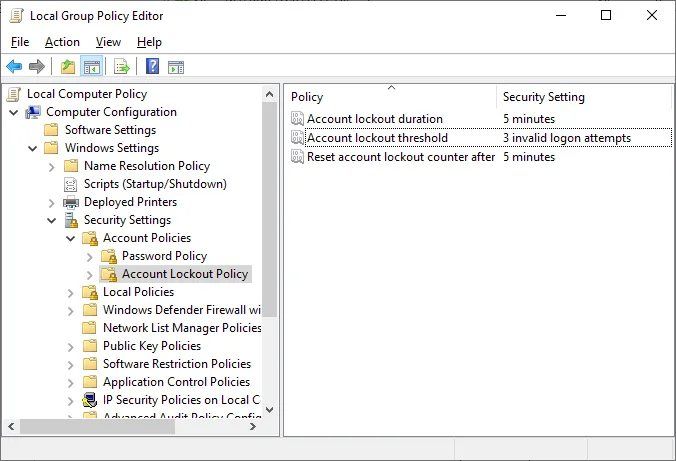
In the editor, go to Computer Configuration > Windows Settings > Security Settings > Account Policies > Account Lockout Policy and set the 3 strategies :
-
Account lockout threshold: value of 3 connection attempts
-
Account lockout duration: value of 5 minutes
-
Reset account lockout counter after: value of 5 minutes
2 Port opening on the router
Once you have configured the gateway, you need to open the port you have entered on your router that links your WAN to your LAN. This is done by performing a PAT command to translate the port 875 to the port 3389. This command is performed under a cisco router. Of course, depending on your architecture, this command may change. Check the documentation for your router to find out about the command.
ip nat inside source static tcp {ipa} {ipb} route-map FIBER extendable
3 Installing an RDP Client
Once the gateway is installed and the port on your router is open, all you have to do is connect. Here's how to do it.
Connecting to the RDS server (or other) :
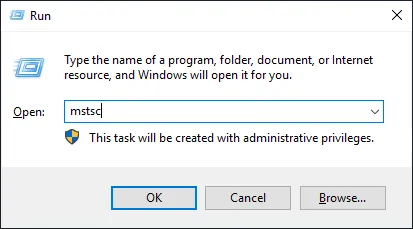
- Open the access client by clicking on Start > Run.
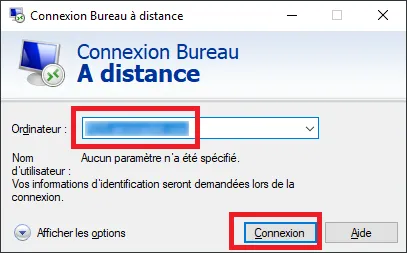
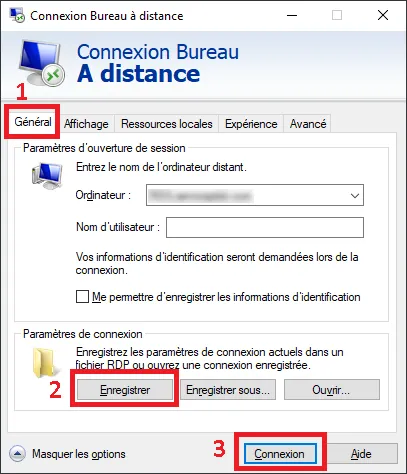
In the dialog box type mstsc. In the remote desktop connection window that opens, enter the local name of the machine to be reached (RDS or other) then click on the Display options. button.
|  |
|  | !
| !
|---|---|
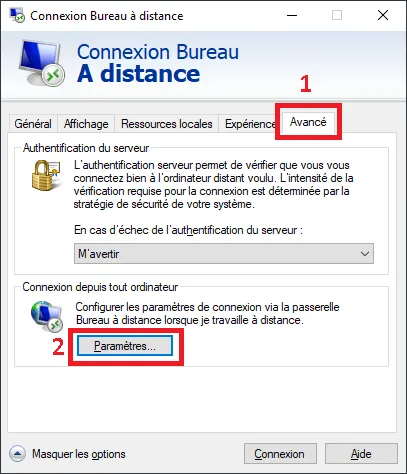
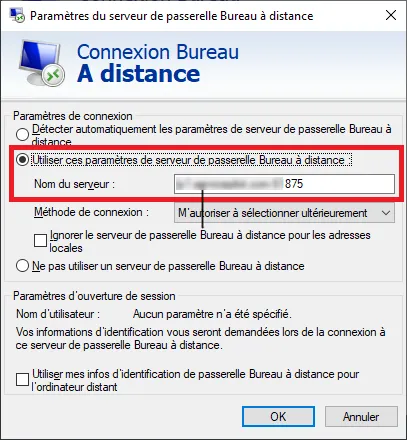
Click the Advanced tab and then click the Settings... Select the Use these Remote Desktop Gateway Server Settings option and enter the gateway address ip.gateway.com:875 then click OK.
Go back to the General tab, click on the Save button to save the configuration and then click on Connect.
 |
 |
|---|
4 Monitoring from the cloud with ServicePilot SaaS PRO
4.1 Installing an Agent on the Gateway
To take advantage of the monitoring solution with ServicePilot, create a SaaS account for free by following the link.
Then, follow the steps in order to administer your gateway server:
- Login to the ServicePilot web interface on your gateway server.
- Using an account with administrator privileges, log in.
- Open the configuration

- Click Agents
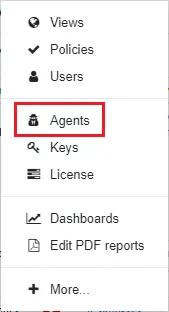
- Click **Install an agent button

- Select the Windows Agent and follow the instructions under Get started

4.2 Router and firewall monitoring
In this section, we will see how to monitor your router as well as its ports and those of your firewall.
4.2.1 Setting up router monitoring
-
Log in to the ServicePilot web interface, using an account belonging to a group with the Admin access level.
-
Open the configuration by clicking on the gear icon and click Views
-
Navigate through the existing view hierarchy in the left pane and click on the view in which you want to add the new resource

-
Select the type of monitoring package required by category and use the filter to limit the options displayed. In our case, we want to monitor a cisco router.
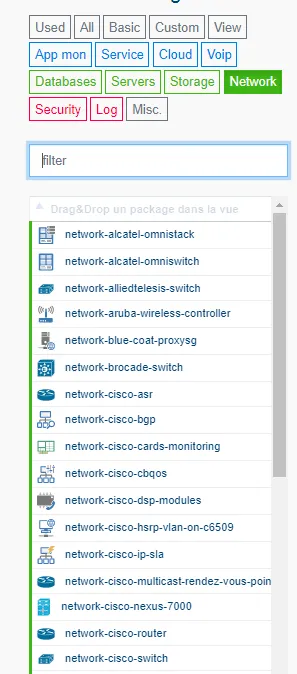
-
Drag-and-drop a package into the central view editor
-
Define the properties of the resources according to the selected package type. A unique resource name is always required as well as all fields marked with _. The resource will use the default _agent to get the data unless the agent fields are filled in with the agents from which the queries are to be made. The Ping SNMP Agent _will be used for all Ping and SNMP queries while the Agent_Agent* will be used for all Ping and SNMP queries.
-
Click OK

-
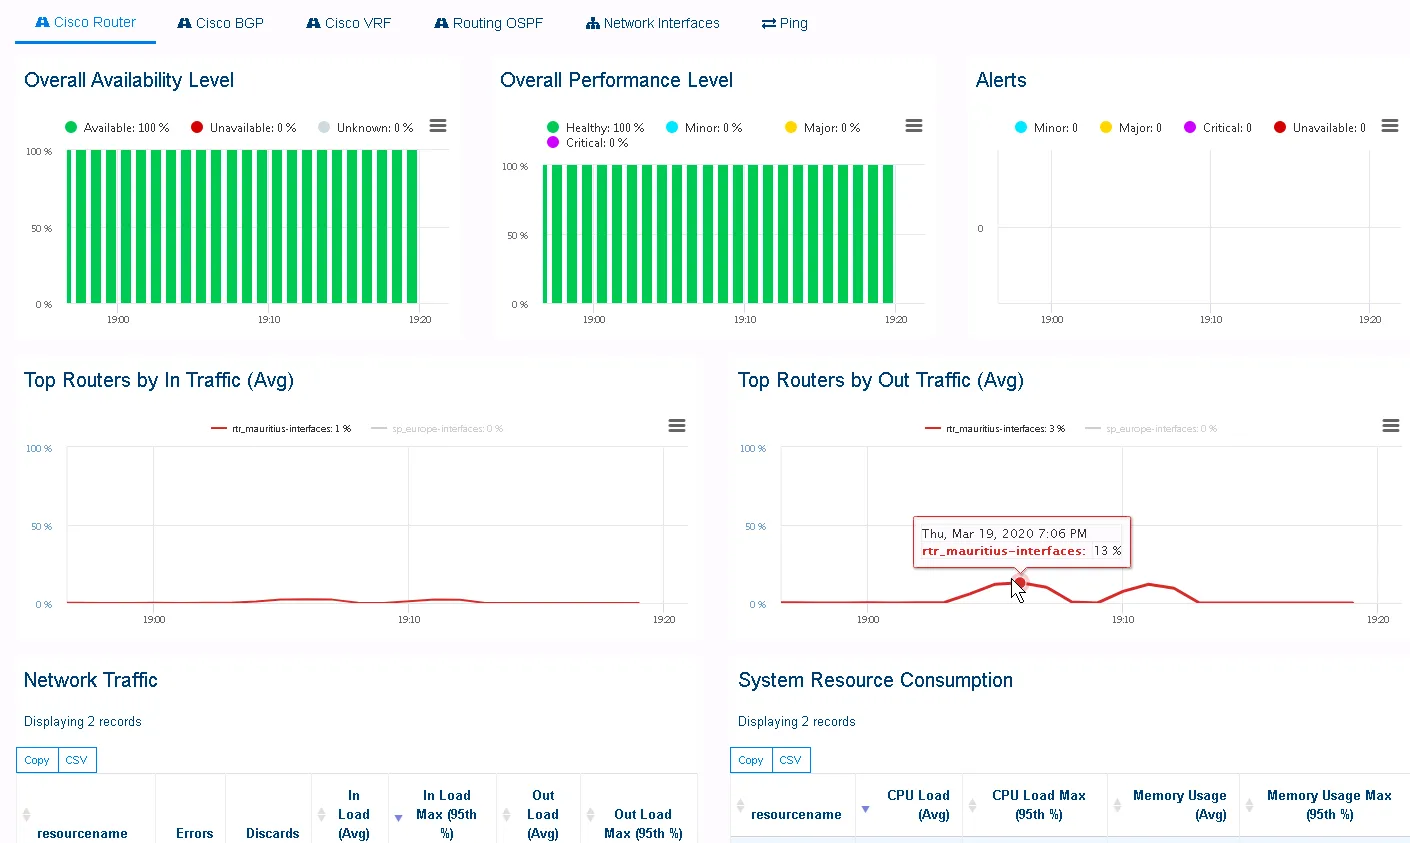
Finally, click on Save all changes button

You can now view your router's monitoring data in the standard dedicated dashboard.
4.2.2 Setting up port monitoring
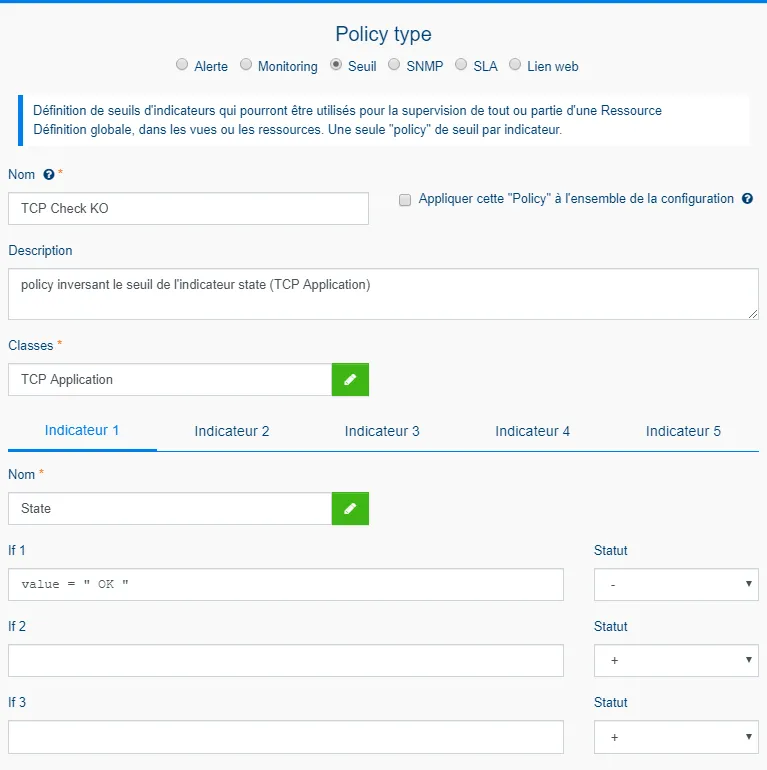
In order to supervise our ports in terms of security, we will apply a reverse policy. This means that, as long as we receive no response from the port we are trying to reach, then the port will return an "ok" indicator. Conversely, if we receive a response from the port, then it means that there is a security breach and that port has been opened. Of course, on open ports, you can do the opposite, without using this policy.
First we will create a reverse threshold policy:
-
Login to ServicePilot, using an account belonging to a group with access level Admin.
-
Open the configuration
-
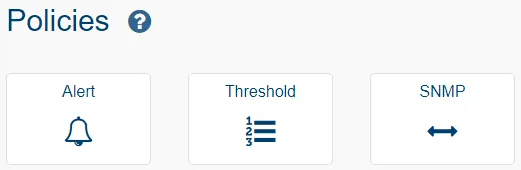
Go to "Policies "
-
Click on Add a policy button

-
Complete the dialog box as attached (here, an example of a reverse policy for TCP checks). Using the green pencil, find and select the TCP Application class (Help the filter by typing "TCP Application"). Do the same for the Name box. Finally, type as attached in the box "IF 1", this will reverse our indicator.
-
Click OK
-
To finish, click on Save button

Next, we will add a resource in our view to monitor ports and link it to our reverse policy. If you don't want to apply the policy to your resource, simply don't select a policy in the resource configuration.
-
Open the configuration by clicking on the gear icon
-
Navigate through the existing view hierarchy in the left pane and click on the view in which you want to add the new resource
-
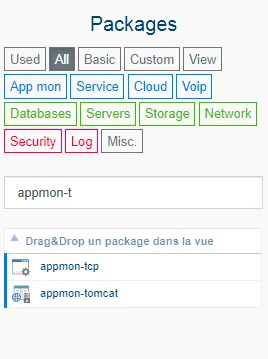
Select the type of monitoring package required by category and use the filter to limit the options displayed. To monitor TCP ports, choose appmon-tcp.
-
Drag-and-drop a package in the central view editor
-
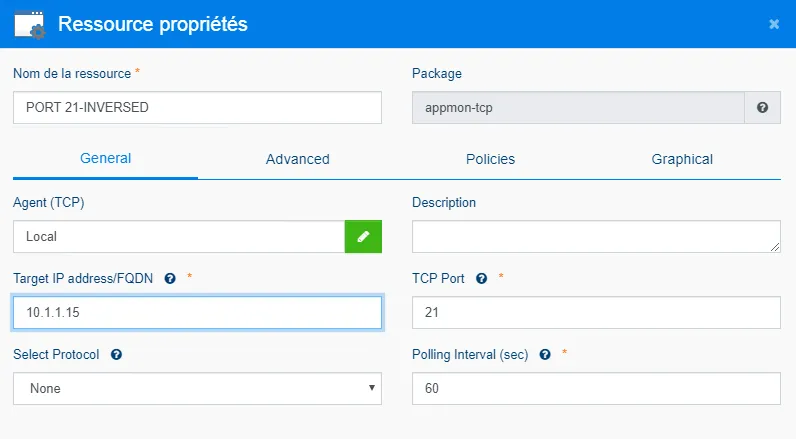
Define resource properties according to the selected package type. A unique resource name is always required as well as all fields marked with. The resource will use the default agent to get the data unless the agent fields are filled in with the agents from which the queries are to be made. In our example, we configure a monitoring on port 21 with our local agent on the IP 10.1.1.15.
-
To apply our reverse policy, go to the policies tab, click on the add a policy button and select your reverse policy "TCP CHECK KO ". If you do not wish to apply this policy, do nothing.
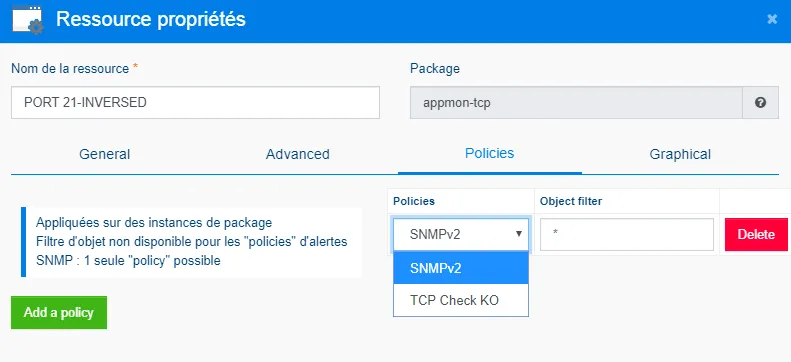
-
Click OK
-
Finally, click on Save all changes button
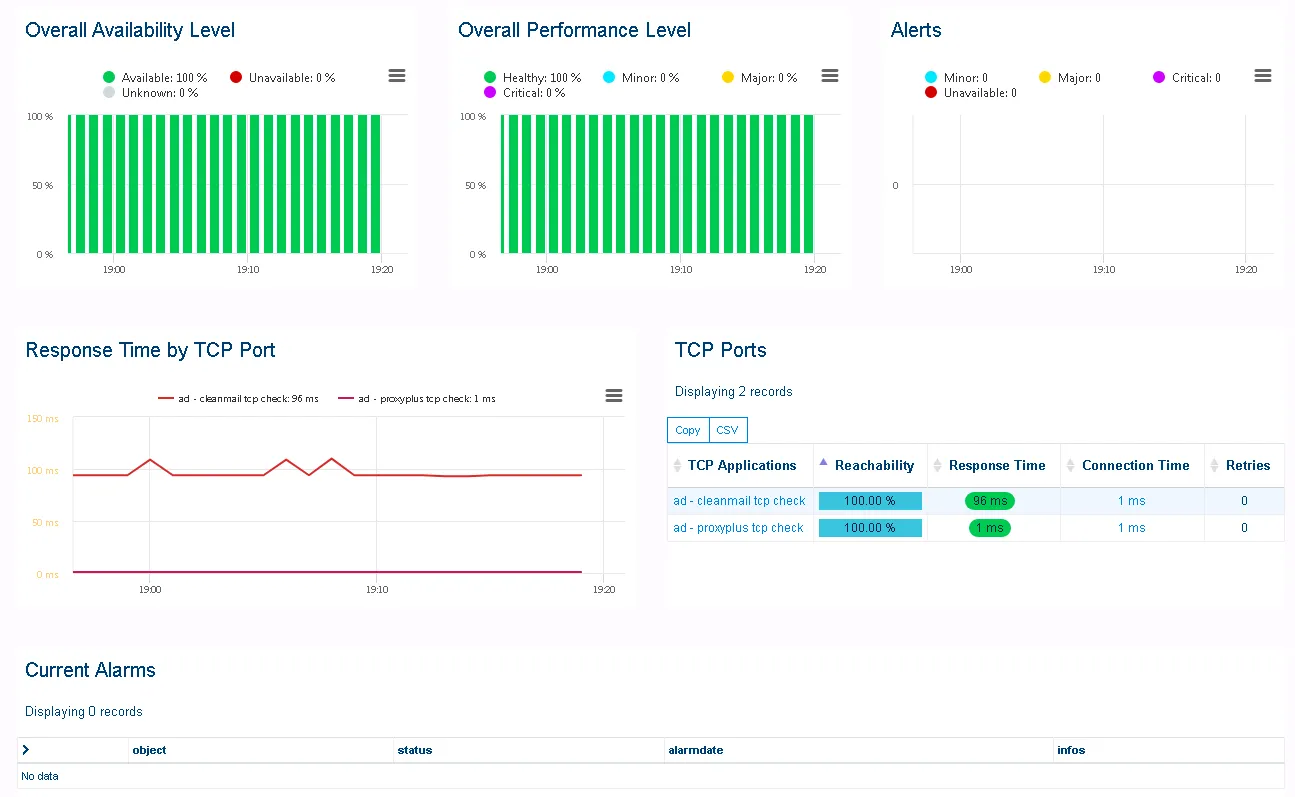
All you have to do is add a resource for each port on your gateway and/or router.
All new port checks are automatically added to the corresponding standard dashboard.
4.3 RDS connection monitoring
During this part, we will see how to monitor the connections to the gateway. At the end of this tutorial, you will have on your dashboard, the times and IPs of connections of your colleagues via the RDP gateway. In addition, you will also have the possibility to see the HTTP connections of the people connected to the platform, the response times of each website and many other things.
4.3.1 Setting up connection monitoring
-
Login to ServicePilot, using an Admin account.
-
Open the configuration by clicking on the toothed wheel in the upper right corner and click on Views.
-
Select the type of monitoring package required by category and use the filter to limit the options displayed. In our case, we will use the package services-appflow.
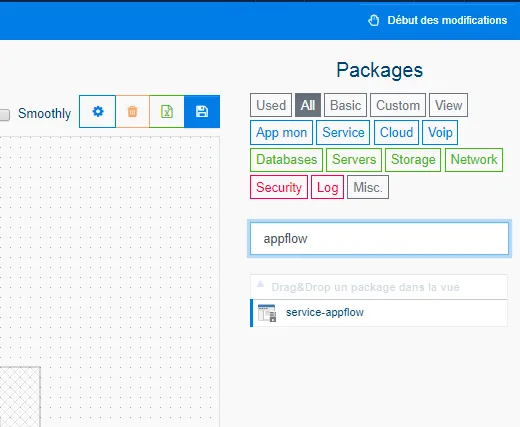
-
Configure the package as you wish. In our case, we leave the local agent (that's why the agent box is empty) and select all interfaces using the star symbol.
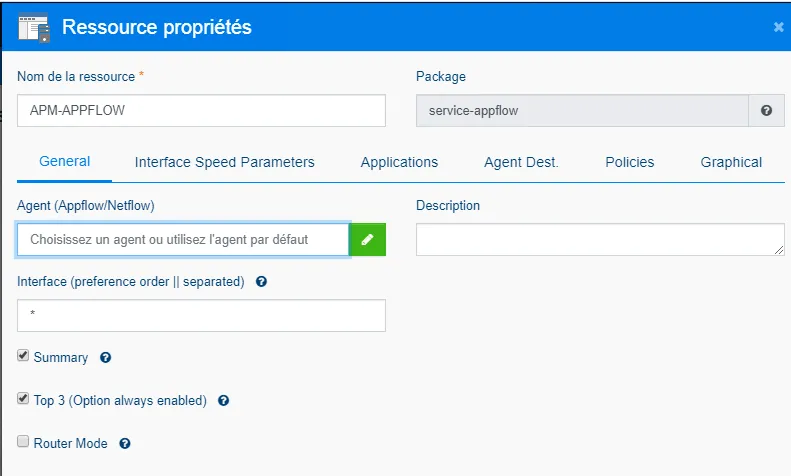
-
Click OK
-
Finally, click Save all changes button
-
Re-open the configuration by clicking on the cogwheel in the upper right corner and click on Services.
-
Click on Add a Service.

-
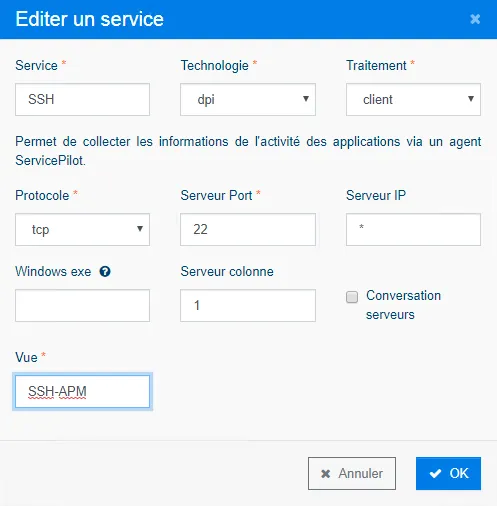
Configure the service of your choice (in our case, we configure an APM for the SSH service):
-
The Service box allows you to enter the name of the service.
-
Leave the Technology box in dpi
-
For processing, choose server (as opposed to image)
-
Choose the protocol of the service you wish to supervise
-
Enter the port you want to listen to in the Server Port tab.
-
Leave the star symbol in the IP Server box unless you wish to enter an IP. If you specify an IP it will be the listening IP.
-
Enter a name in the View box, this will create a new view under this name.
-
Click OK
-
Here is another example with a configuration we could do for our RDP Gateway server:
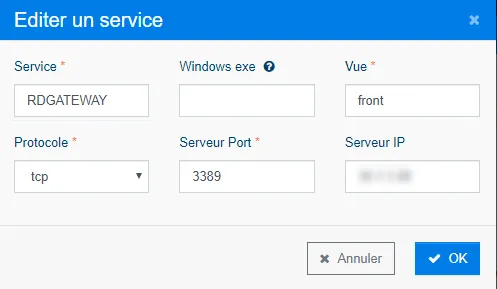
-
Finally, click on Save all changes button
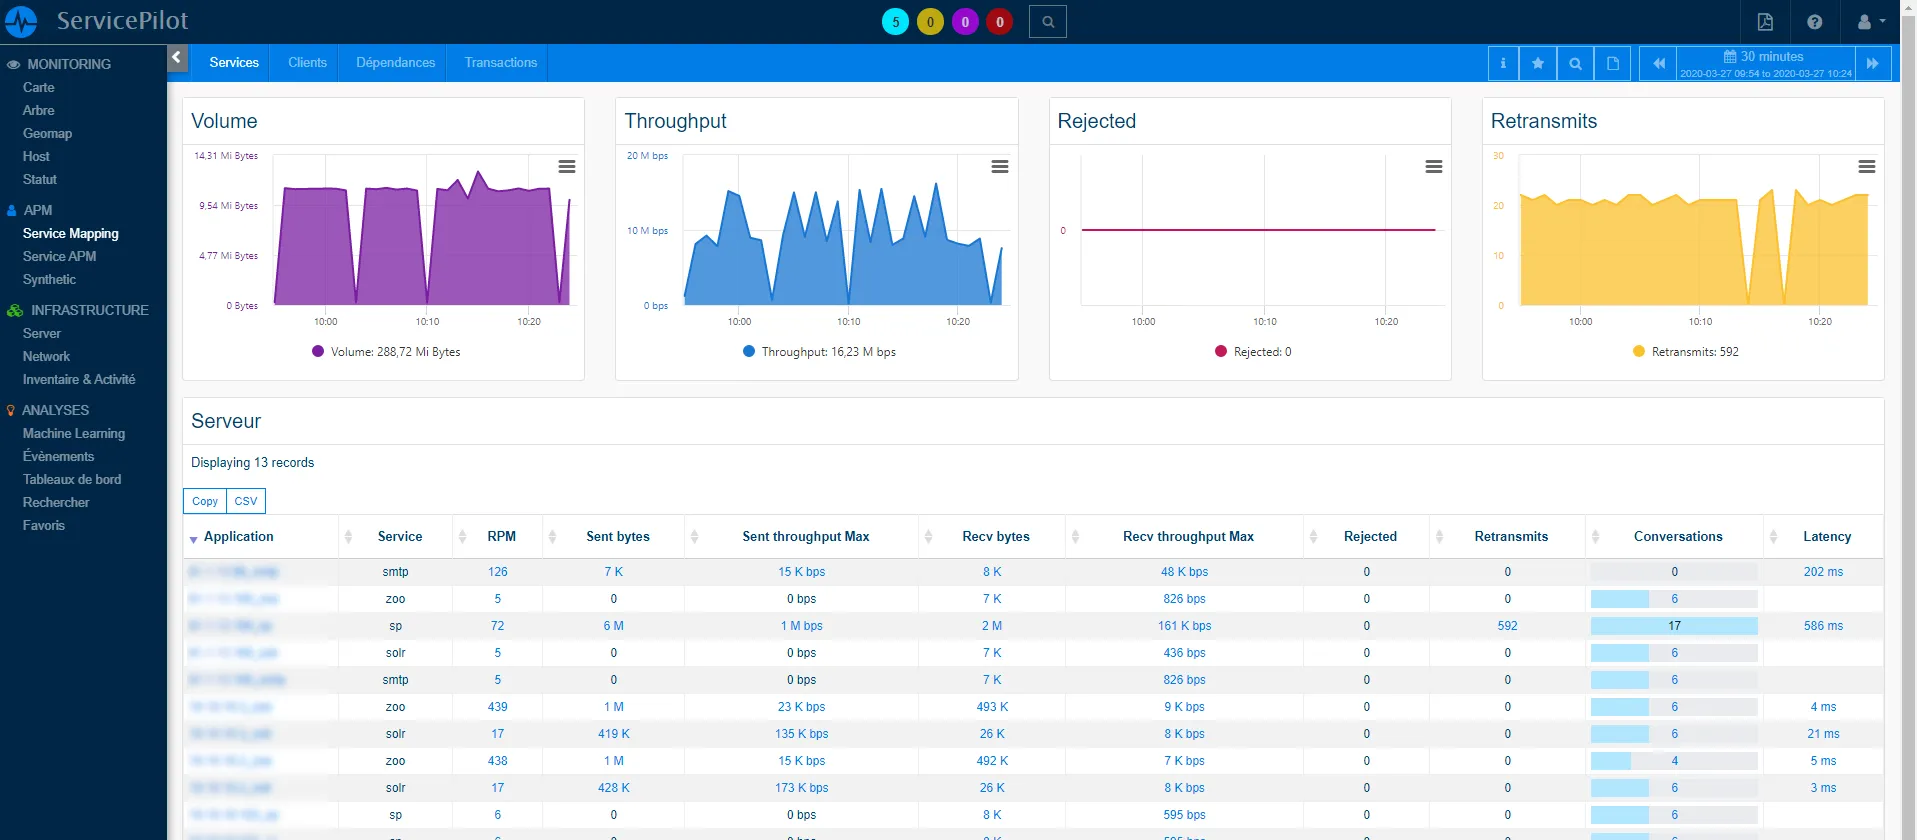
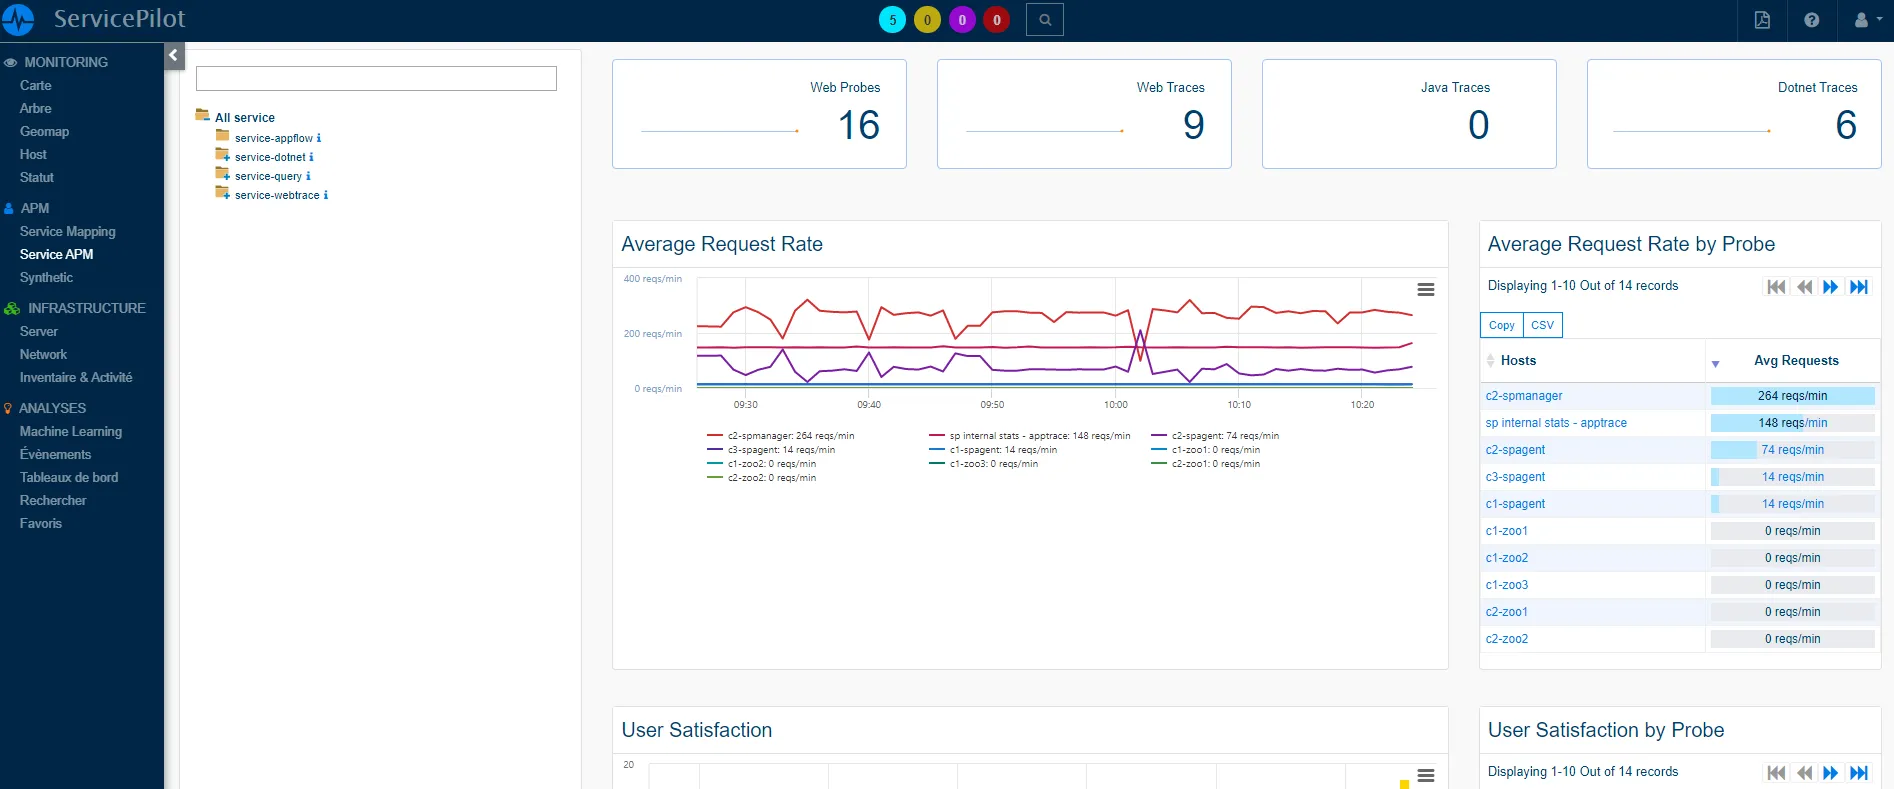
-
The following is an example of what can be obtained once several APMs have been configured
4.3.2 Setting up monitoring with the events viewers
-
Login to ServicePilot, using an Admin account.
-
Open the configuration by clicking on the toothed wheel in the upper right corner and click on Views.
-
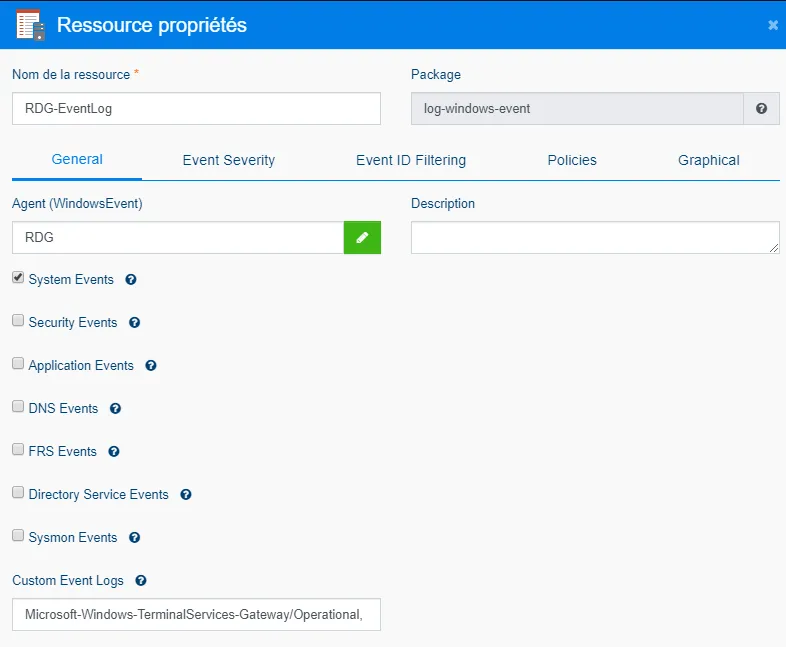
Select the type of monitoring package required by category and use the filter to limit the options displayed. In our case, we will use the package log-windows-event.
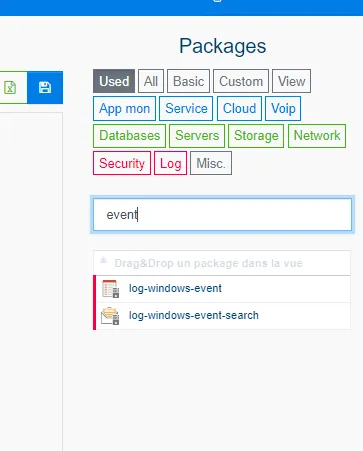
-
Configure the package as you wish. In our case, we assign the agent installed on the gateway machine.
-
Click OK
-
Finally, click Save all changes button
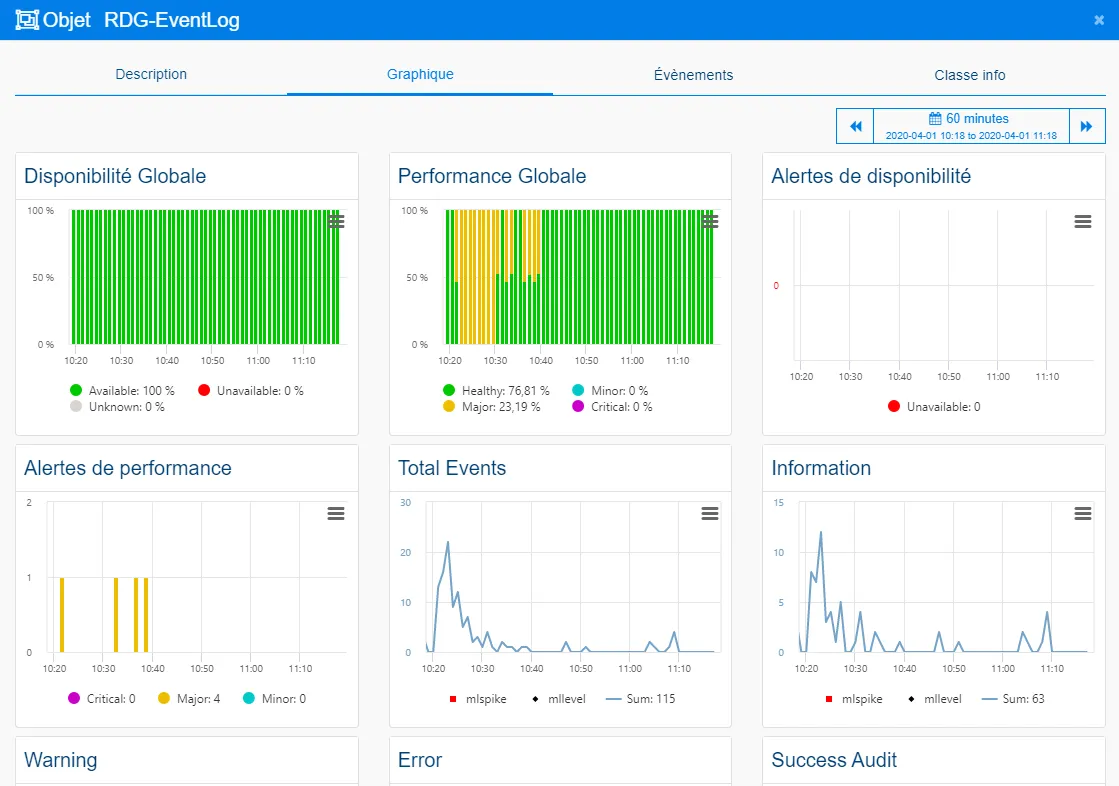
-
Once provisioning is completed, the result is as follows:
4.3.3 Setting up RDP session monitoring
-
Login to ServicePilot, using an Admin account.
-
Open the configuration by clicking on the toothed wheel in the upper right corner and click on Views.
-
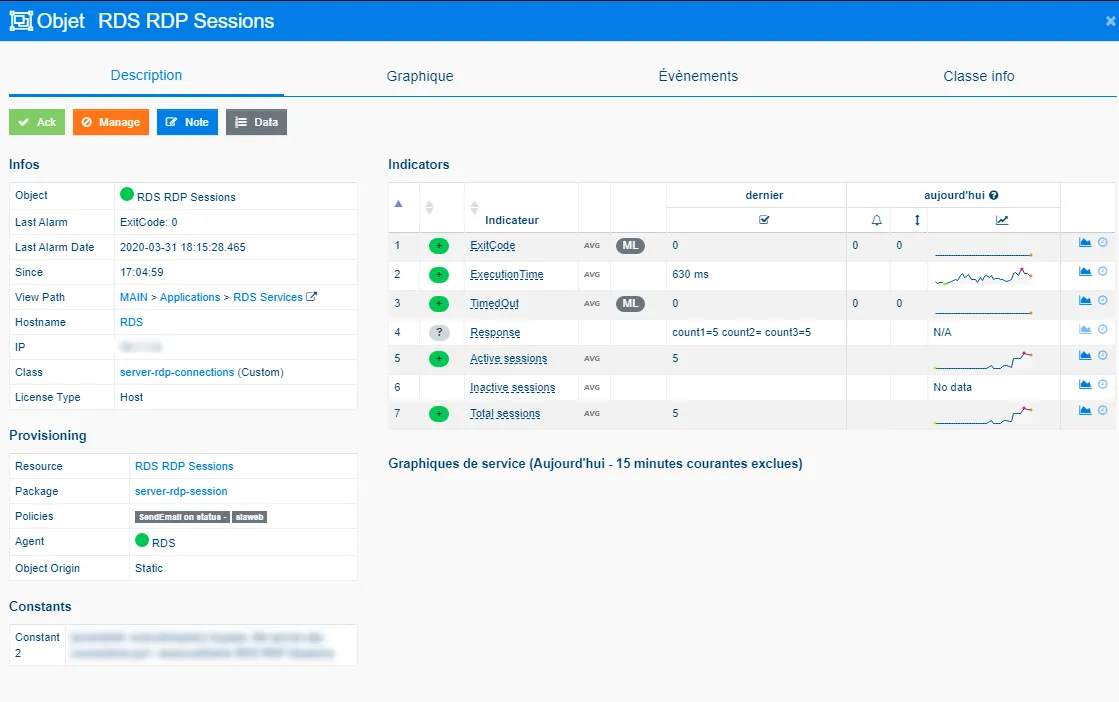
Select the type of monitoring package required by category and use the filter to limit the options displayed. In our case, we will use the package server-rdp-session.
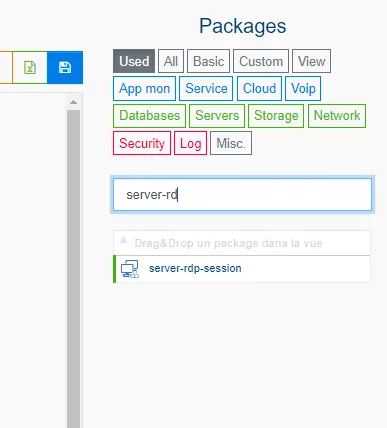
-
Configure the package as you wish. In our case, we assign the agent installed on the gateway machine.
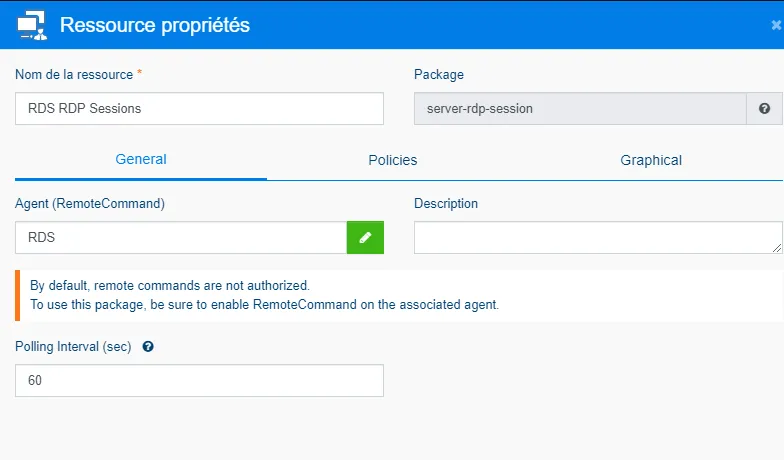
-
Click OK
-
Finally, click on Save all changes button
-
Once provisioning is completed, the result is as follows:
4.4 Resources
- ServicePilot Agent Documentation : https://www.servicepilot.com/fr/doc/agents/
- ServicePilot documentation on packages : https://www.servicepilot.com/fr/integration/
- ServicePilot policy documentation : https://www.servicepilot.com/fr/doc/policies/
- Microsoft documentation on RDP: https://support.microsoft.com/fr-fr/help/4028379/windows-10-how-to-use-remote-desktop
- Microsoft documentation on the RDP Gateway: https://docs.microsoft.com/en-us/windows-server/remote/remote-desktop-services/rds-plan-access-from-anywhere
- Cisco PAT documentation: https://community.cisco.com/t5/security-documents/pat/ta-p/3114711
