Monitoring hierarchy
ServicePilot stores time series of data as indicators in objects. These objects are placed in a tree hierarchy of views originating from a root view called MAIN. Views can contain multiple items including other sub-views, objects as well as graphical elements and shortcuts to other parts of the view hierarchy. The monitored equipment is added to the configuration as resources based on the package templates.
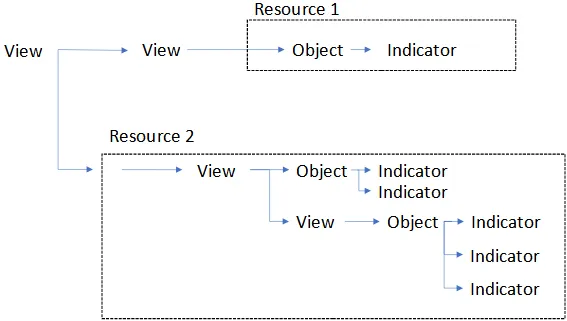
Hierarchy of all views
Views offer the ability to represent your information system from different perspectives: geographical organization (sites, regions, data centers), business (applications, critical services, functional chains) or even by technical silos (applications, network, servers, databases, cloud, security).
Views also allow you to restrict visibility of the configuration to a specific user group by assigning one or more views in the group settings (Operator or Reader).
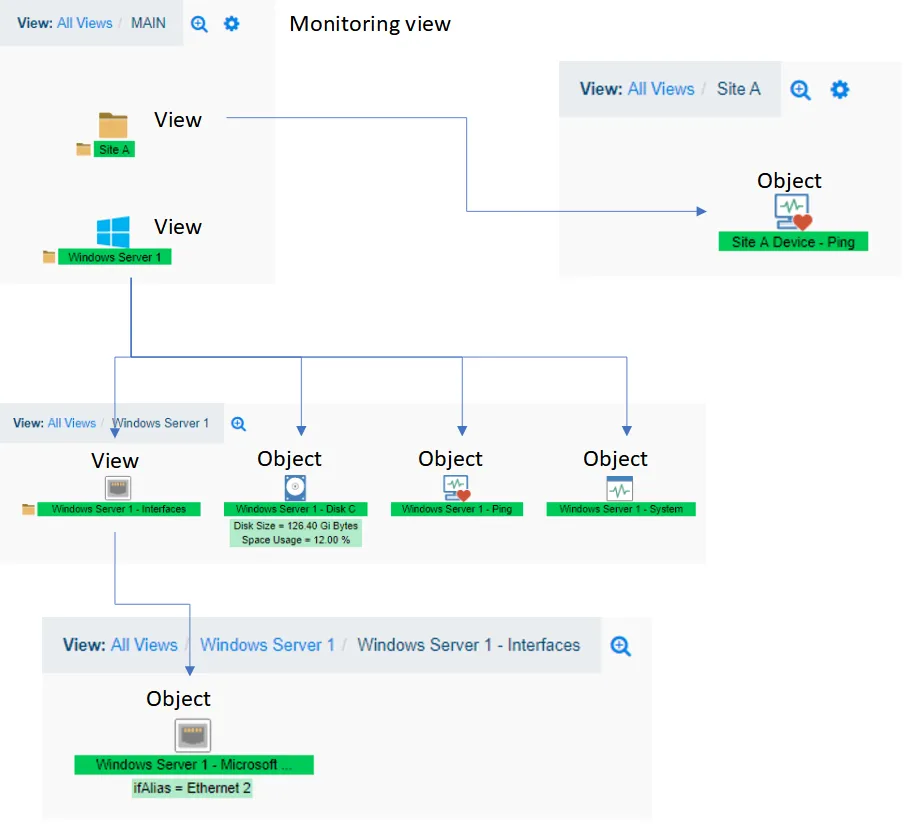
Here is an example hierarchy of views and objects. A Site A view has been created in which resides an object named Site A Device - Ping. The MAIN view also includes a Windows Server 1 view containing objects and a sub-view containing more objects.
Object and indicators
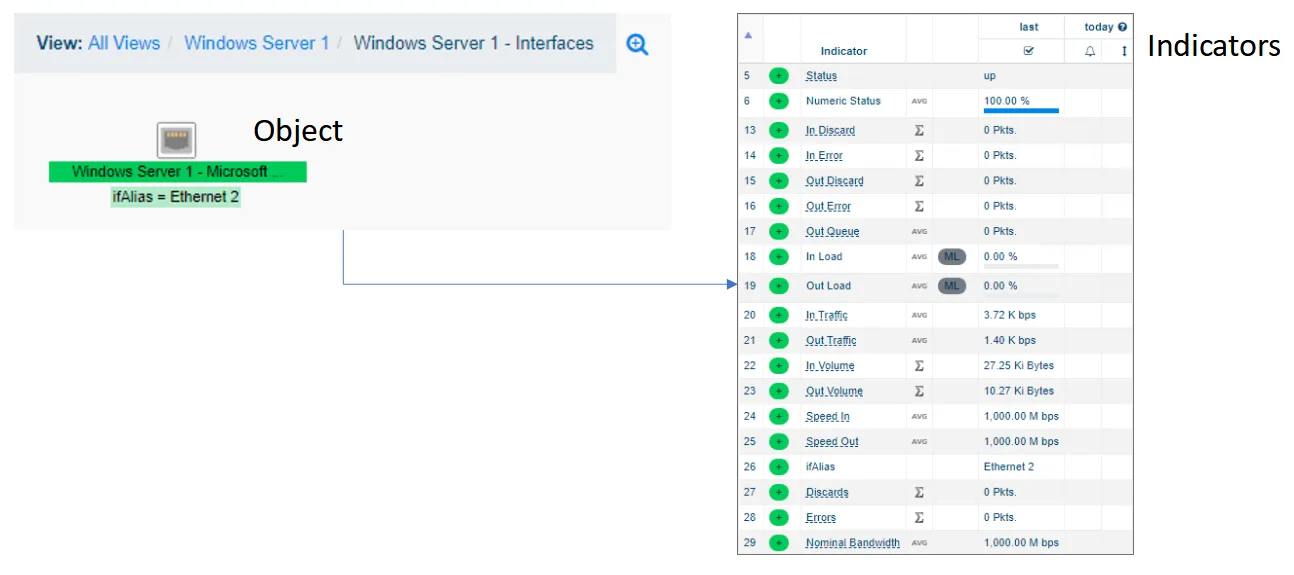
Each object contains one or more indicators. The indicator’s values come from the monitored systems. Each object is based on a class that defines the type of object and therefore what indicators it will contain.
View configuration
Before adding resources to monitor, start by creating some views in which to place the resources. These views will help categorize the devices monitored and group elements, maybe by technology or by geographic location. When resources are added to the configuration, they will include sub-views and objects of their own to complete the hierarchy of monitored elements.
Editing views
Add a view
It is best to place your monitored resources in to views and sub-views so that they can be categorized and managed.
- Using a user with admin privileges, log in to ServicePilot.
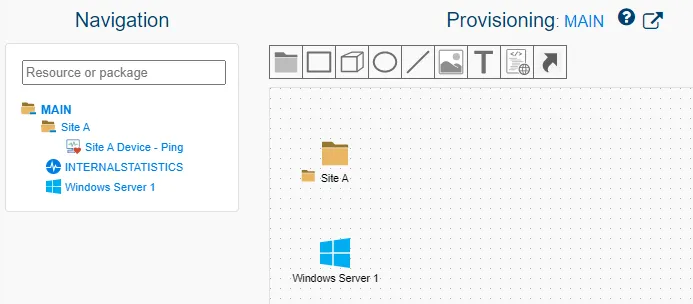
- Open SETUP > Provisioning.
- Navigate in the existing view hierarchy in the left hand pane and click on the view in which you wish to create your new view.
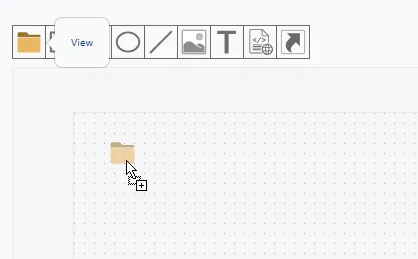
- Drag and drop the view icon into the view pane.
- Give the new view a unique name and click on OK.
- Click on Save to confirm the changes.
Modify view
There are a number of ways to access view parameters. They can be reached via Provisioning > View editor > view icon > Properties, Provisioning > View editor > Properties for the current view and via Provisioning > Resources.
View settings can change:
- View visibility
- View geo location if, for example, the view represents a site
- View icon
- View position in its parent view
- View size
- View background color
- View display type
- The arrangement of icons inside the view
1. Access to the view parameters
- Using a user with admin privileges, log in to ServicePilot.
- Open SETUP > Provisioning.
- Navigate in the existing view hierarchy in the left hand pane and click on the view which contains the view to change.
- Click on the gear icon.
- Click on OK once changes have been made.
- Click on Save to confirm the changes.
2. Access to the view parameters from the gear
- Using a user with admin privileges, log in to ServicePilot.
- Open SETUP > Provisioning.
- Navigate in the existing view hierarchy in the left hand pane and click on the view to change.
- Click on the view properties icon.
- Click on OK once changes have been made.
- Click on Save to confirm the changes.
Shortcuts
Shortcuts are links to other objects and views in the monitoring hierarchy. They allow for the cloning of the link’s destination status to the view in which the shortcut is placed.
Note: Users that are members of groups that have access to views containing shortcuts will be allowed to navigate to these shortcuts’ destinations, even if these destinations are outside of the group’s view access list. Users will be able to see all view, object and indicator data from the shortcuts’ destinations.
Create a View shortcut
View shortcuts provide access to a destination view and all of its content. The resource name for the shortcut must be unique amongst all of the resource, object and view names.
A view shortcut could, for example, allow for resources to be visible in both a logical hierarchical grouping and also in views by geographic location. A server could be defined in a view for the server’s site and a shortcut to the server added to a view containing all resources that relate to an application that the server hosts.
- Using a user with admin privileges, log in to ServicePilot.
- Open SETUP > Provisioning.
- Navigate to the view in which you wish to place the shortcut.
- Drag and drop the name of a destination view from the left-hand Navigation hierarchy into the Provisioning pane.
Create a shortcut to a view that is inside resources
View shortcuts provide access to a destination view and all of its content. The resource name for the shortcut must be unique amongst all of the resource, object and view names.
As views that are part of resources are not listed in the left-hand Navigation hierarchy when editing your configuration, shortcuts to these views must be added by adding an object shortcut and manually entering the name of the view in the Object name field as the desgination of the shortcut.
- Using a user with admin privileges, log in to ServicePilot.
- Open SETUP > Provisioning.
- Navigate to the view in which you wish to place the shortcut.
- Drag and drop an Object shortcut from the icon above the Provisioning pane into the Provisioning pane.
- Enter the name of the destination view in the Object name field.
Create an Object shortcut
Object shortcuts provide access to a destination object. The resource name for the shortcut must be unique amongst all of the resource, object and view names.
Object shortcuts might be useful to create a view grouping together a number of monitored elements from different resources that comprise an application. Object shortcuts might also be used to link to objects deep in the monitoring hierarchy and make these particular elements more evident.
- Using a user with admin privileges, log in to ServicePilot.
- Open SETUP > Provisioning.
- Navigate to the view in which you wish to place the shortcut.
- Drag and drop an Object shortcut from the icon above the Provisioning pane into the Provisioning pane and use the object list picker to set the destination Object name.
